Wednesday, April 10, 2013

Jeeze Louise.  Ridiculous. So I lost a bunch of stuff and said I was going to fix it SEVEN MONTHS AGO!?!?  :o(  I used to really enjoy blogging, what the hell happened?
I want to revamp this thing.  No longer just a recipe blog. I want to journal all kinds of everyday shit.  I am going to promise myself to start this weekend.  Can't do it right now because right now but
GONNA START THIS WEEKEND I PROMISE!!!!!!

 photo swakowjpg.gif

Tuesday, September 11, 2012

UNDER CONSTRUCTION

Ugh, just lost a year's worth of posts.  Working on fixing it...
Be back soon.

Saturday, May 5, 2012

¡Cinco de cupcake!


Photobucket
We celebrated Cinco de Mayo in class on Friday.  The students brought in different foods and asked me to bring in cupcakes of course.  So I set out to come up with some kind of Mexican dessert I could translate into a cupcake.  I went with the obvious and did a trial run of a tres leches cupcake with dulce de leche buttercream.  It actually tasted really good but because of the soggy consistency I just couldn't see them not turning completely disgusting by 6th and 7th period (which was when we were having our party).  So I thought about a churro as inspiration.  I ended up making what I called a cinnamon churro crunch cupcake.  
I made a basic yellow cake and divided the batter into three bowls.  I left one plain and dyed the other two red and green so I would have the colors of the Mexican flag.  I put a teaspoon of cinnamon each in the red and green batters.  
Photobucket

I wandered into a little local Mexican grocery for some churro-ish (yes I just made up that word) inspiration.  I asked the guy working there what would be good to put into a cake that would make it taste like a cinnamon churro and he showed me a box of cinnamon wafer cookies.  I bought them and tasted them and they were really good!  I crushed up a bunch to use in the cupcakes.  In one cupcake batch I put the crumbs on the bottom of the batter in the cupcake liner.  In the other batch I put them on top of the batter before baking.  Both were really good but the one on top was better b/c it came out crunchy.  (Well, it was crunchy until the next morning when I went to frost them.  By then, the "crunch" was the same consistency as the cake but still tasted really good!)
Photobucket


I got out all of my red, green and white sprinkles to decorate.  I got a box of 100 Mexican flag picks on eBay for $4 and free shipping!  I REALLY love eBay.  I can not stop buying stuff off of it.
Photobucket


Yum!  Each cupcake had lots of layers.  I kinda smooshed the icing when cutting this one in half for a photo, but I think it still looks really neat.Photobucket
I told the students that I was blogging this recipe and I wanted them in this entry.  They are all super kids!  
Get 'em all sugared up then send them to 8th hour!  Photobucket
Photobucket
Photobucket

The recipe:

BHG yellow cake
Ingredients
  • 2 1/2
    cups all-purpose flour
  • 2 1/2
    teaspoons baking powder
  • 1/2
    teaspoon salt
  • 2/3
    cup butter
  • 1 3/4
    cups sugar
  • 1 1/2
    teaspoons vanilla
  • 2
    eggs
  • 1 1/4
    cups milk


    directions

    Grease and lightly flour two 8x1-1/2-inch or 9x1-1/2-inch round baking pans or grease one 13x9x2-inch baking pan; set pan(s) aside. Combine flour, baking powder, and salt; set aside.

    In a large mixing bowl beat butter or margarine with an electric mixer on medium to high speed for 30 seconds. Add sugar and vanilla; beat until well combined. Add eggs, one at a time, beating 1 minute after each. Add dry mixture and milk alternately to beaten mixture, beating on low speed after each addition just till combined. Pour batter into the prepared pan(s).
    Bake in a 375 degree F oven for 30 to 35 minutes or until a wooden toothpick comes out clean. Cool layer cakes in pans on wire racks for 10 minutes. Remove layer cakes from pans. Cool thoroughly on racks. Or, place 13x9-inch cake in pan on a wire rack; cool thoroughly. Frost with desired frosting. Makes 12 servings.
    Variation Yellow Cupcakes:To make cupcakes, grease and lightly flour thirty 2-1/2-inch muffin cups or line with paper baking cups. Prepare cake as directed in Step 2. Fill each cup half full. Bake in preheated oven for 18 to 20 minutes or until a wooden toothpick inserted in center of a cupcake comes out clean. Cool on a wire rack. Makes 30 cupcakes.

Monday, April 9, 2012

New Entries Coming Soon!!!

Oh my goodness I haven't blogged in forever!  I *have* been baking and cooking up a storm since my last entry, taking photos of all the steps in the process of all the amazing things I have made.  These photos and recipes are all saved in a file in my hard drive... and that's where they have been sitting over the last year. :o(
I got a wonderful job at the junior highschool in town working with some great kids last August and just haven't had the time to sit down and work on my blog.  So that's why my weekdays are busy.  And now that my kids are both in school where there are a lot of sports and actitives, weekends are full of "kid stuff" and family, etc. so I haven't had weekends to work on it either.  I plan on hitting it hard-core next month (May 2012) and getting it all caught up!  See you soon.

Phyllis

Photobucket

Tuesday, July 19, 2011

Toothpick Cake for Reid's birthday

Photobucket

Ok, so my husband's family makes this cake they call "toothpick cake."  It's kind of famous within their family.  Reid's grandmother came up with it.  It's a boxed mix chocolate cake with a homemade cooked caramel icing.  It really is quite fabulous.  The reason it's called toothpick cake is because she couldn't keep the gooey icing from sliding off the cake and taking the top layer with it.  So she stuck toothpicks in it to hold it all together.  Reid's mom also makes the family toothpick cake.  Growing up, they had no air conditioning in their house and with Reid's birthday in July, she literally had to sit in the fridge with the door open to frost it so it didn't melt off as she was doing it.   Reid loved this cake as a kid because it was fun to him to pick out the toothpicks.  Ah, the things that little kids find amusing!  As an adult he still loves it because it tastes so good.

So anyhoo, one of the first birthdays we spent as a married couple Reid asked me if I would make him toothpick cake.  So I called his mom to get the recipe.  I immediately saw the problem- they made the caramel icing with margerine instead of butter.  No wonder it was so runny!  So I made my first batch with butter and it was a solid (pun totally intended) success.  I have made this for him every year since wtih an exception here and there, like the year I started getting so many requests for my oreo cake.  He had to have an oreo cake that year.  But we are back to basics once again and all is well in Birthdaycakeland.

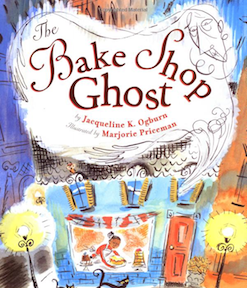
But you know me- I can't make the dreaded BOXED MIX CAKE that he grew up with.  I have a from-scratch cake that I now make.  And this cake has a story too.  Last year my daughter brought home a book from the school library called The Bake Shop Ghost.  It's about a ghost that lived in a bakery and wanted a chocolate cake.  Tallulah asked me if we could make a chocolate cake from scratch.  Heck yeah we can!

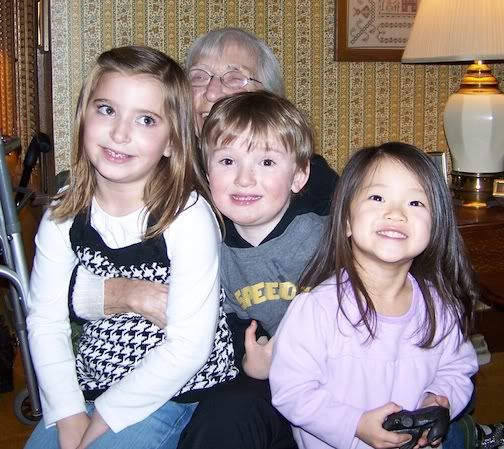
Cake inspiration #1: Reid's grandmother (Nana).  Can you see her buried under those great-grandchildren?
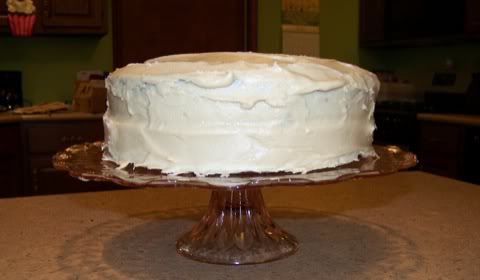
Photobucket

Cake inspiration #2
Photobucket


First the cake...

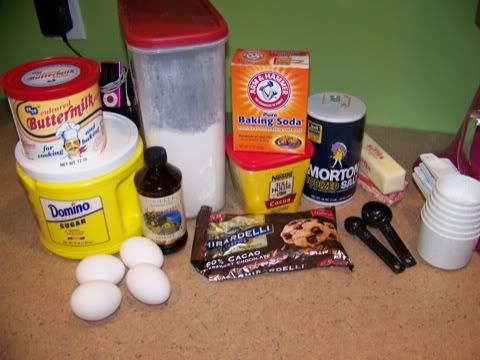
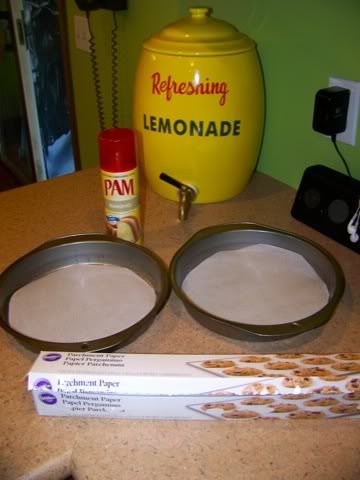
Get out your ingredients.
Photobucket


Spray and line your pans with parchment.
Photobucket

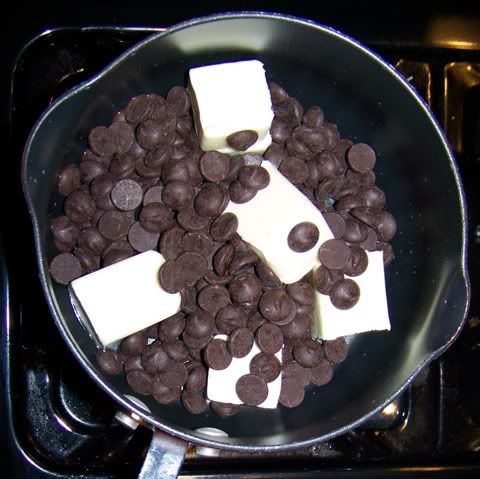
Melt your chocolate and butter over a very low heat.  Make sure you use good-quality chocolate.  The recipe states that you can use bittersweet or semi sweet.  I just LOVE that dark chocolate flavor.  I recommend Ghirardelli 60% chocolate chips.  They are fab.  If you prefer it a bit sweeter, then use semi sweet.
Photobucket

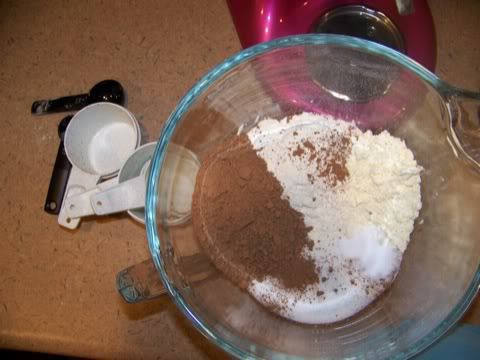
Mix your dry ingredients in your mixer.
Photobucket

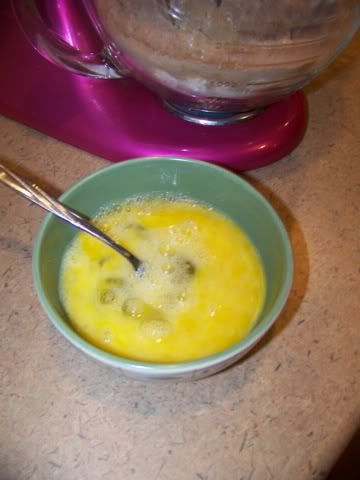
Beat your eggs like they owe you money.  Not really- just beat them lightly.
Photobucket


Once your chocolate looks like this, it's done.  It shouldn't even be really hot, just a little warm.  If it's too hot, let it cool a bit or you'll end up with scrambled eggs in your batter.
Photobucket

Mix water, vanilla and eggs together then pour into dry ingredients.
Photobucket

Wisk it all together.
Photobucket

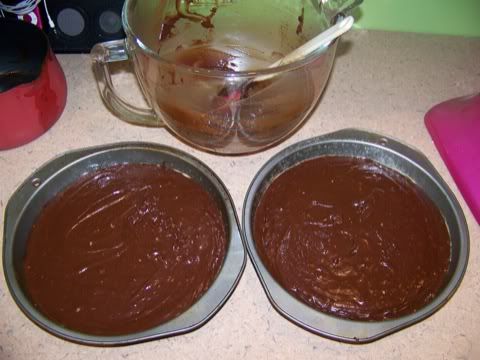
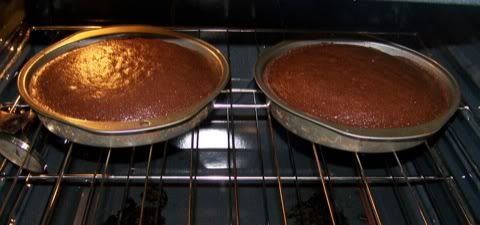
Pour into prepared pans.
Photobucket

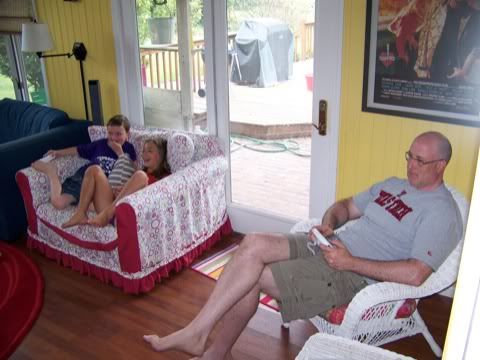
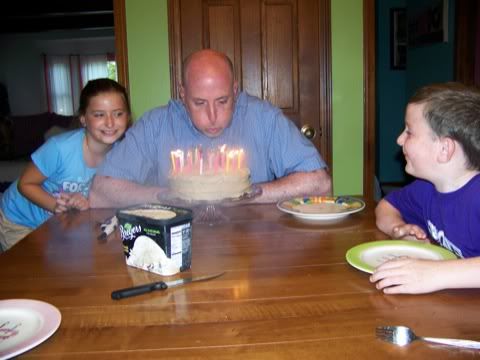
While the cake bakes, watch your husband and kids play the new Mario sports video game he got for his birthday.  Serioulsy, I don't know who is more obsessed with the Wii- Reid or the kids!!!
Photobucket

Looks done to me!!!
Photobucket


Caramel icing
Photobucket


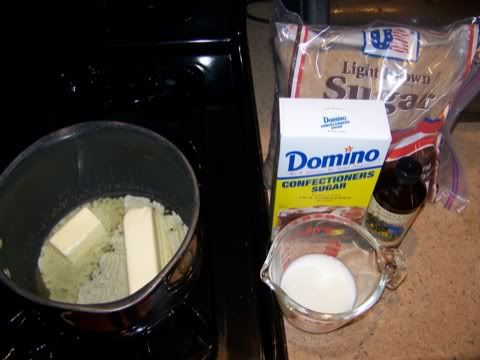
Melt butter in a small saucepan.  Add brown sugar and milk.  Boil gently while stirring.
Photobucket


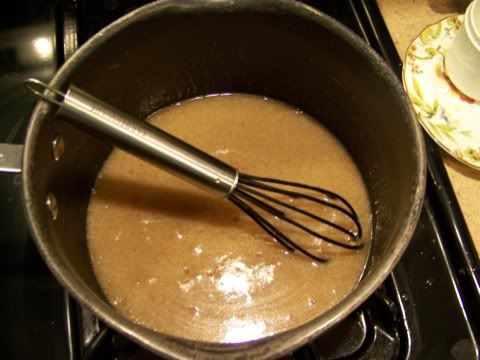
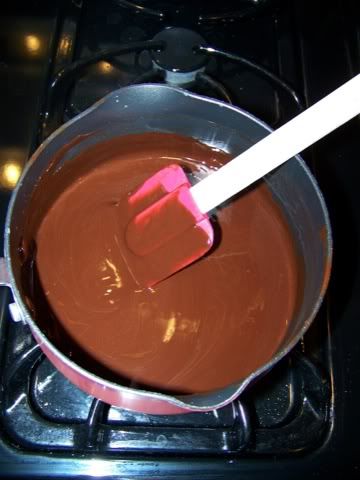
Let sugar mixture cool for 10 minutes.   Look at how dark and yummy it looks!
Photobucket


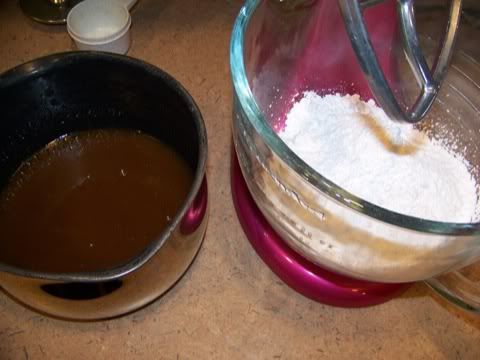
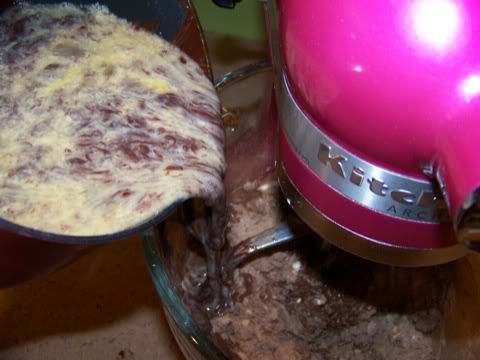
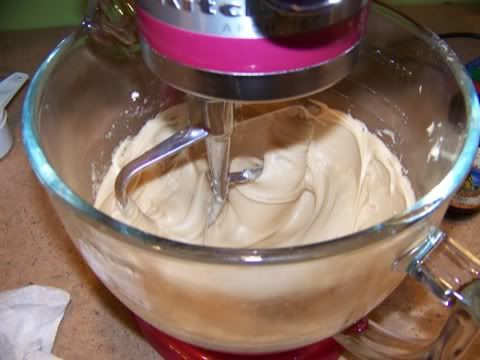
Blend into powdered sugar.
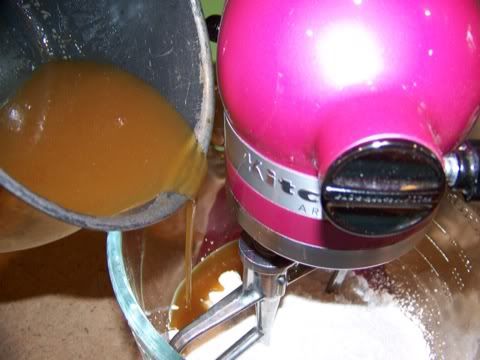
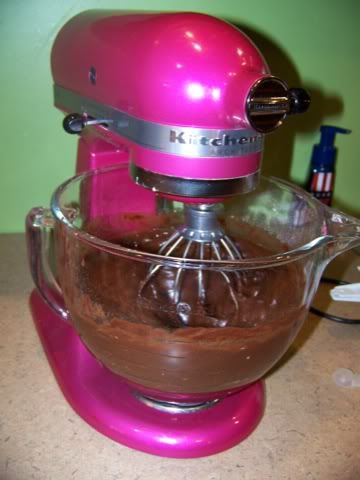
Photobucket


Beat until smooth.
Photobucket


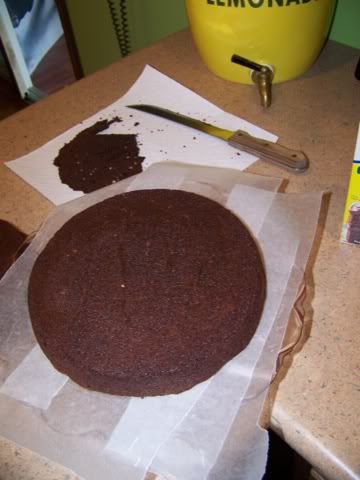
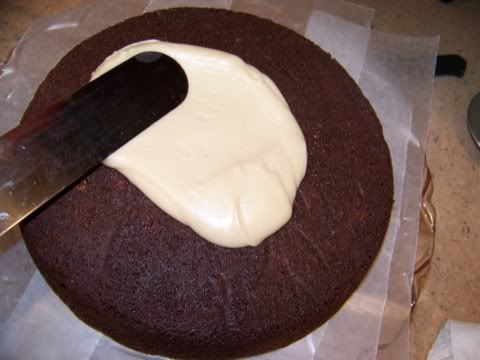
Trim the rounded part off the top of one cake and lay it cut side down.  I always put waxed paper down on the cake plate so I don't slop all over it.
Photobucket


Spread frosting on bottom layer.
Photobucket
Photobucket


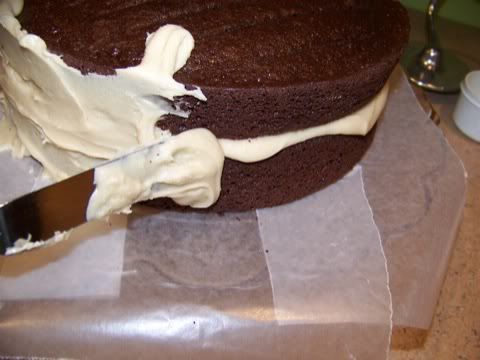
Put top layer on, flat side down (don't trim this one unless you prefer a perfectly smooth, flat top).  Frost the sides.  Just spackle it on.  This frosting gets firm quickly.  Well, not FIRM.  It's... I don't even know how to describe it.  It's still creamy even when it's dry but it just sets up really fast.  It's magical.
Photobucket

Glop on the top layer.  Try not to drool.  The smell of the warm buttery caramel is still in the air and right under your nose.
Photobucket

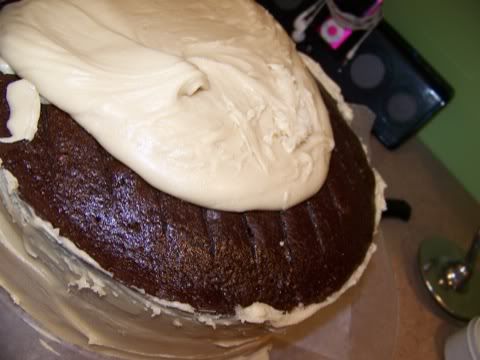
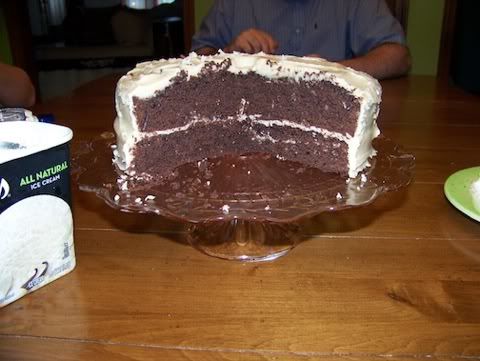
It's impossible to make this a pretty cake unless you can work very fast.  To me it makes no difference.  At least not with this cake.  The flavor makes up for the non-smoothness.
Photobucket


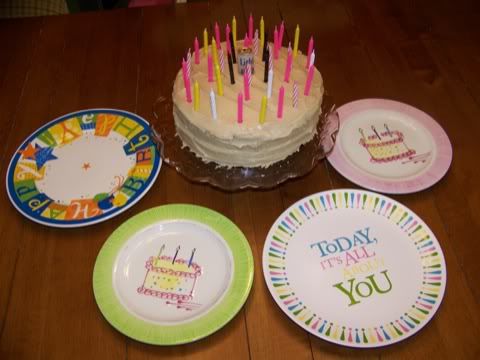
When you discover your candle supply is low, dig into your daughter's leftover candles.  Hubby won't mind as long as THIS cake is under them.
Photobucket


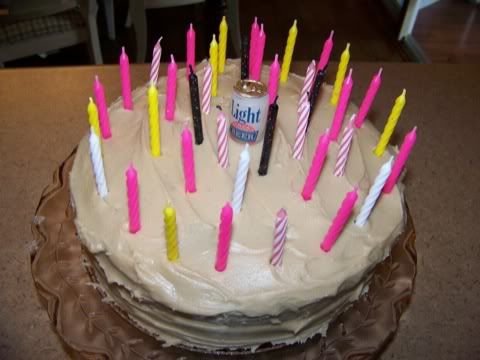
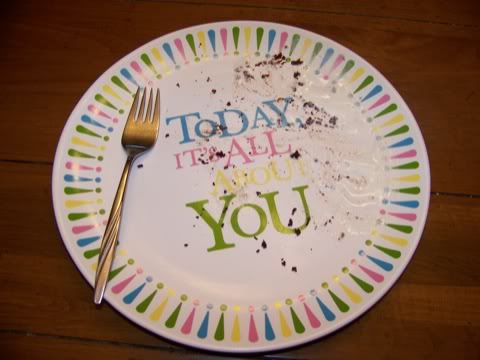
Birthday person gets to choose their cake plate first.  Then everyone else gets to pick.
Photobucket


Make a wish!
Photobucket


Plain vanilla ice cream is the perfect match for this sweet, rich, dense cake.
Photobucket


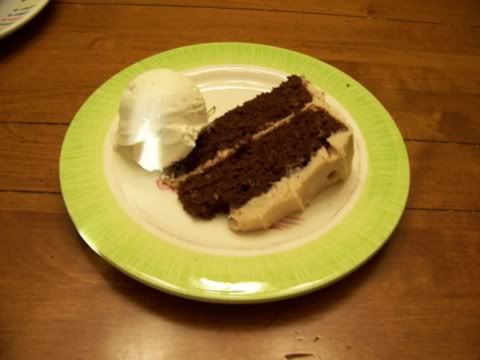
I didn't think to make perfect, clean slices for photos.  But just look at it's chocolately goodness staring at you!!!!!  I swear it is moist and awesome.  My horrible camera flash washes everything out.
Photobucket


Yes, yesterday it was all about Reid.  But now that nonsense is over, let's get back to ME.
Photobucket


The men of Winterfell approve of this entry.
Photobucket


Caramel Icing

2/3 c. butter
1 c. brown sugar (dark looks best but light works just as well)
1/2 c. milk
1 pound powdered sugar
1 tsp vanilla

Melt butter in pan.
Add sugar and milk, bring to boil.
Stir constantly while boiling gently for 5 minutes.
Cool for 10 minutes.
Blend in powdered sugar and vanilla.  Beat until smooth.