Sunday, July 17, 2011

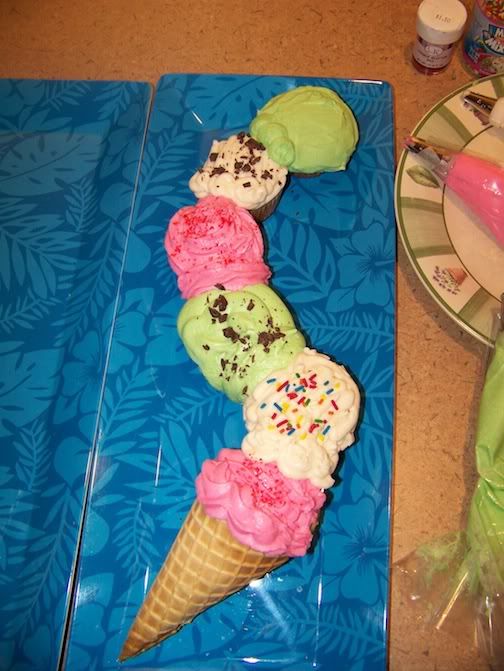
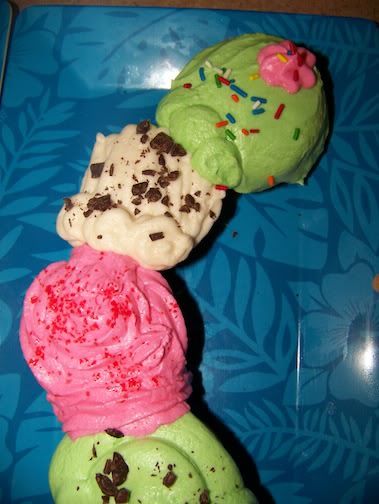
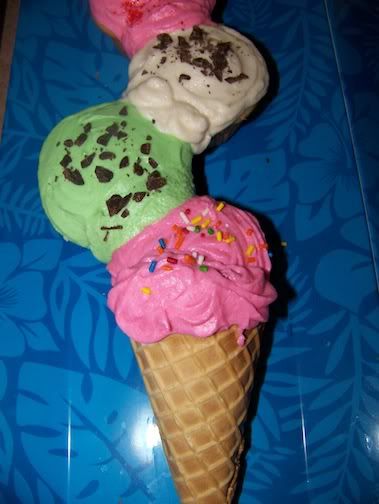
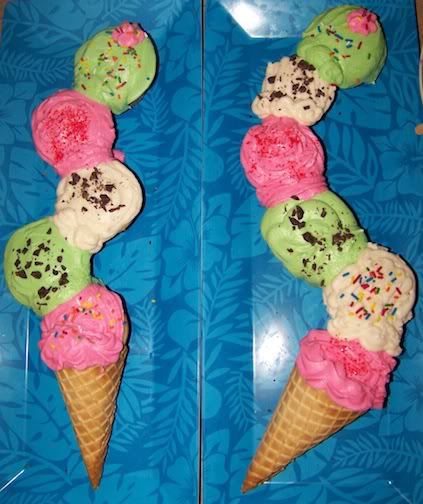
Ice Cream Cone Cupcakes made w/ White Velvet Cake

Photobucket

White velvet is becoming my most-requested cake/cupcake recipe.  Even though I didn't create the recipe, I probably shouldn't share it... but who am I kidding?  You know you'd rather ask me to bring this to your party than make it yourself!  ;)
In addition to the corndog cookies I mentioned in an earlier post, I also brought cupcakes to our block party.  BUT, just like I couldn't "just" bring cookies, I had to make them look like something else.  I also wanted to bring cupcakes that looked like something else.  And just like the corndog cookie, I got this idea from somewhere in the internet world.  I had downloaded the photos to my desktop but didn't save the link.  So not my original idea but I can't credit the one to came up with it because I don't know who it was.

I can't believe I'm sharing these photos because this was kind of a Cupcake Fail.  It was so fucking hot in my kitchen (despite the fact that the rest of the house was a comfortable 72 degrees) and the buttercream icing kept melting.  I'd stick it in the freezer for a few minutes but then it would get too hard to pipe out so I'd have to set it out, then it would start to melt again.  Ugh.  THEN, I noticed when I was decorating that some of the cucake bottoms were burned.  Just the bottoms.  I never would have noticed if I hadn't put a dot of icing on the bottom to "glue" them to the cake board.  The rest of the cupcake was totally fine.  Tops were not dry (ok maybe a teeny bit dry) and didn't taste burnt.  I'm guessing one of my cupcake pans was touching the side of the oven.  (Note to all of you: this is why you aren't supposed to let your pans touch the side of the oven).

But I spent so much time on these damn cupcakes THERE WAS NO WAY I WASN'T BRINGING THEM!!!!!!!!!!  Deal with it!!!!!!!  Ah so much cupcake rage going on here...  Did I mention that we had to get up at 5am this same morning to drive all the way out to Munster for my daughter's swim meet????  Then drive aaaaaaall the way back home so I could put all this together?
Ok, enough excuses.  Let's get to the photos and recipe.

Bake your cupcakes and let them cool.  You could use your favorite flavor of cupcakes for this idea.  I chose the white velvet because I thought it would look better with a white base.

I made a buttercream icing and divided it into 3 bowls.  I tinted two of them to look like strawberry and mint choc chip.
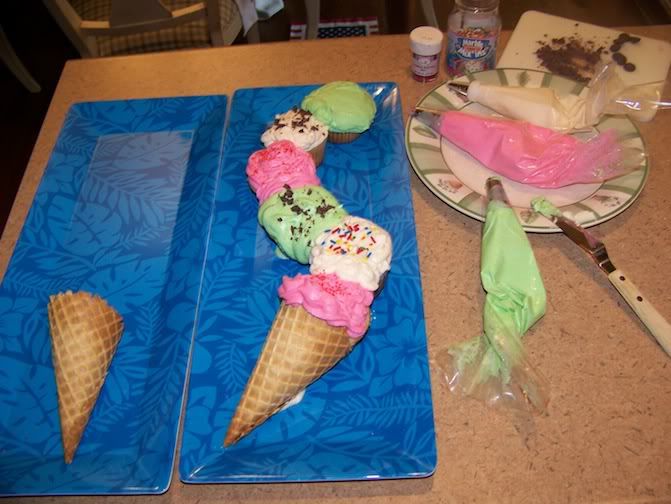
Photobucket

Photobucket

Photobucket

Photobucket

Photobucket


By now they're all melting and gloppy.  The green was really too melty.  But eh, still kind of cute.  At this point, I just threw frosting on the rest of the cupcakes without decorating.
Photobucket

Corndog Cookies

Photobucket

Nothing says summer fun food like a corndog!   Even if it's a fake corndog.  Last night for our annual summer block party, I made some corndog cookies on a stick.   I used my favorite sugar cookie recipe.  I never used to like sugar cookies.  Despite their name, they are usually kind of bitter and they just don't taste good unless you put a ton of gloppy icing on them.  Not that I don't love gloppy icing, but if you NEED gloppy icing to eat something, it's probably not worth eating.  The texture of these is fabulous too.  They're soft-ish cookies unlike the normal crisp and tasteless sugar cookie.  AND, they do not spread when you bake them!  If you make a star or Christmas tree shape, they don't bake into these weird, round Patrick Starfish shapes.  So this recpie is also perfect for cutouts for holiday cookies.
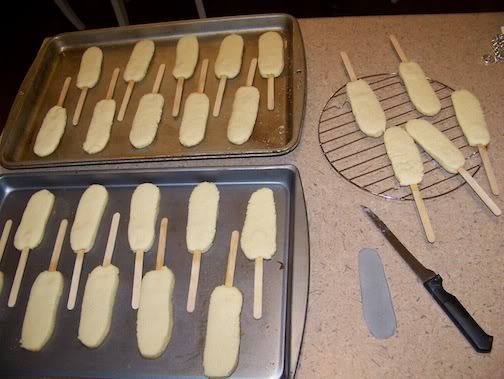
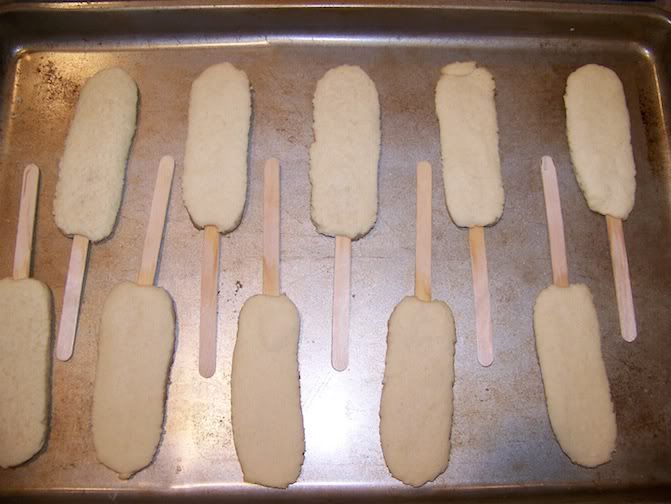
After you make the dough you can roll it out then cut it into your favorite shapes.  I didn't have a cutter for this kind of cookie so I took a corndog out of the freezer, set it down on a piece of cardboard and traced it.  I cut that out and used it as a template.  I set it on top of the rolled out dough, used a sharp knife to cut it out and placed them on a cookie sheet.  I slid popsicle sticks into them then baked for about 8 minutes.  I made them on the thick side so it took a few extra minutes.

Photobucket
See that grey thing in the lower right corner- that's my corndog template.   High-tech, eh?

Bake until juuuuuuust a smidgen golden around the edges.  Don't overbake or you'll get a nasty crisp cookie.
Photobucket


Decorate using a "cookie decorating" icing so you get that shiny look.  You could used canned or a regular buttercream but you won't get the same look.  I tried a decorating recipe years ago that had that Wilton dried egg white meringue (sp?) stuff and it was awful.  So I shied away from ever using decorating icing but then found this kind of icing recipe recently.  It uses cornsyrup and powdered sugar.  And that's what makes it shiny and tasty too!  Very easy to make, very easy to work with.  There are a ton of these recipes out there.  I like this one because it doesn't use almond extract.  I got it from a girl on a LJ baking community that I'm in.

Photobucket
I found the paper hot dog holders at Kroger last week on clearance in the summer/picnic section.  I think I got them for like $1/package.

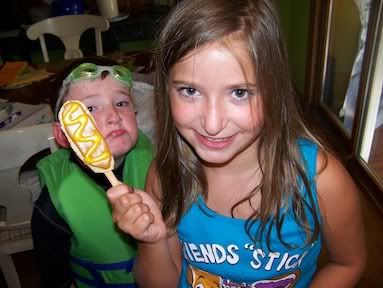
My taste-testers loved them!  They were a hit at the party too.
Photobucket
Don't even let Tanner's face fool you.  He got a cookie too.  He was just mad that he ate his before I even had a chance to pick up my camera.


The Best Ever Sugar Cookie Recipe

3 Cups sifted all-purpose flour
1 1/2 tsp baking powder
1/2 tsp salt
1 c. white sugar
1 c. butter
1 egg, lightly beaten
3 tbsp cream (I never have cream except around the holidays so I usually sub. skim milk for this)
1 tsp vanilla (which means 1 tbsp for me but I ALWAYS use lots of extra)

1. Preheat oven to 400

2. Over large bowl, sift together flour, baking powder, salt and sugar. (NOTE: I did this the first time I made these cookies.  Later I broke my sifter so the next time I made them I just used a whisk to blend the dry ingredients together and the cookies came out the exact same texture so the sifting is entirely up to you).

3. Cut in butter and blend with pastry blender OR pulse in food processor until mixture resembles cornmeal.  Stir in egg, cream and vanilla.  Blend well.  Dough may be chilled if it is sticky.

4. On floured surface, roll out dough to desired thickness.  Cut into shapes and transfer to cookie sheet.

5. Bake for 6-8 minutes or until just barely golden around the edges.


Sugar cookie decorating icing

1 c. powdered sugar
1 tbsp milk
1 drop lemon juice
1 tbsp light corn syrup

Combine powdered sugar corn syrup, milk and lemon juice in a bowl.
Divide the icing into different bowls and add your gel coloring (don't use the liquid food coloring drops).
You can make it a bit thicker for outlining by tossing in a bit more powdered sugar or make it thinner for filling in larger areas inside the outlies by adding more milk- BUT just a drop at a time.  This gets thin very easily.

Sunday, July 10, 2011

Stacie's Hoosier Caviar

Ok, so this dish is originally called "Texas Caviar" but I got the recipe from my friend Stacie and she's from Indiana so I have always called it Stacie's Hoosier Caviar.  Deal with it!

This is Stacie.  She is posing with cheese at a huge gas station on the way back from a girls-only weekend getaway.  We went on a brewery tour and saw a No Doubt concert on this trip.  That is all I can tell you.  The rest is top secret and if I give you any more information, I will have to kill you.
Photobucket

I love how this dip/relish/salsa/salad can be adjusted to any taste.  You can add more or tone down any ingredient.  I don't even follow a particular recipe.  I just start chopping the ingredients.  I have shared this recipe with many people.  Everyone who tries it asks for it!

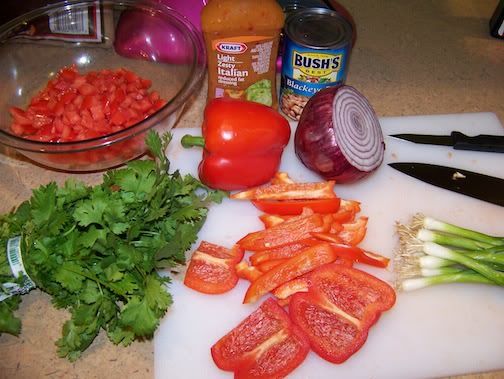
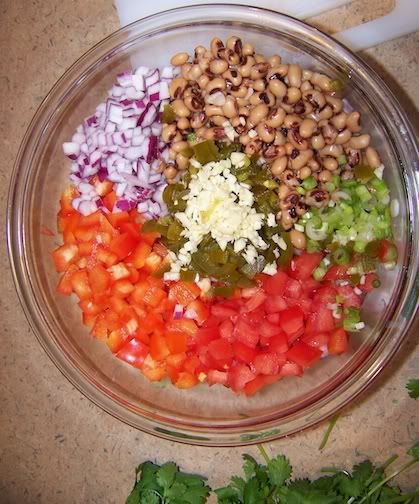
Here are the players in this game.  The tomatoes (already chopped and in the bowl) are roma tomatoes.  First time I tried using them instead of the regular big slicing tomatoes.  I think i made a good choice!  Also, I have always used green peppers in this dish, but I just bought a bunch of red peppers and I wanted to use them so I diced up two.  They added a bit of sweetness that was really good!  Also added cilantro, a red onion that I minced up in teeny tiny pieces, green onions, a can of black eyed peas drained and rinsed and Kraft Zesty Italian dressing.
Photobucket

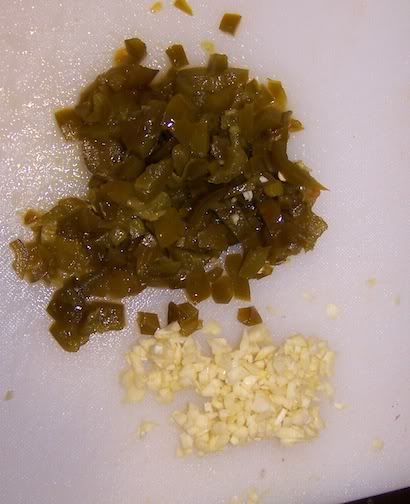
Oopsie- garlic and jalapenos forgot to get in the family photo above.  I minced 3 garlic cloves and about 2 1/2 jalapenos.  You can use fresh jalapenos, but I loooove the jarred jalapenos.  They're still spicy but they have that vinegary taste I love.  Nom nom.  But don't use anything other than fresh garlic!
Photobucket

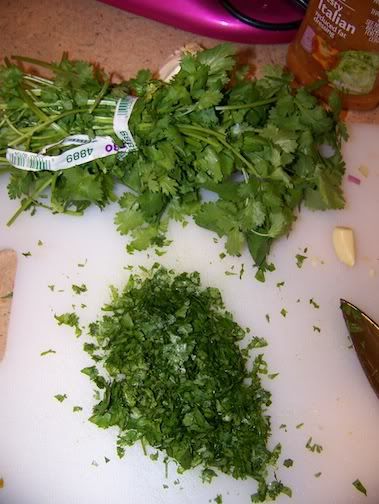
Chopping up the cliantro is always my least favorite part of this recipe.  After you wash it, the leaves stick to your hands no matter how dry you try to get it.  And it takes forever because I pick all the individual leaves off so there are NO stem pieces.
Photobucket

Toss everything in a large bowl to mix.  Hee-hee, I don't normally line everything up.  This is strictly a photo-shoot thing.
Photobucket

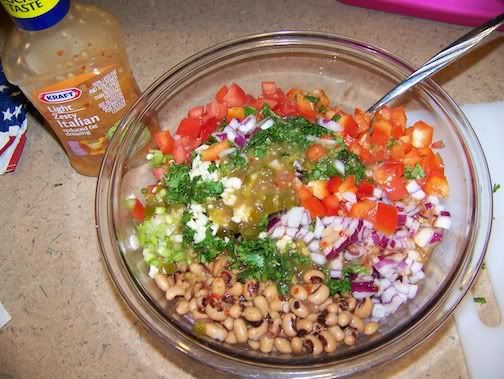
Add the dressing.  This is where Stacie and I are different.  I used half of one bottle- just enough to coat everything and give it a bit of zip.  If I remember correctly she uses the whole bottle, maybe more?  You can adjust to your own taste!
Photobucket


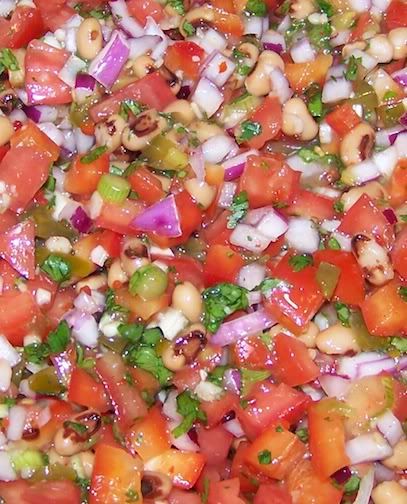
Isn't that gorgeous???  Sooooo fresh and crunchy and good!!!
Photobucket


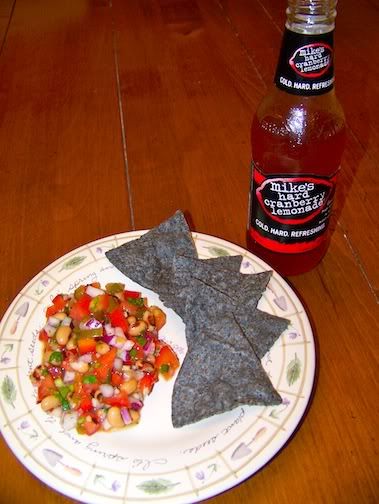
You can eat it like a salsa with some chips, spoon it on grilled chicken or fish (sooooo good on grilled meat!!!) or my favorite way- put some in a bowl and eat it with a fork like a salad.
Photobucket


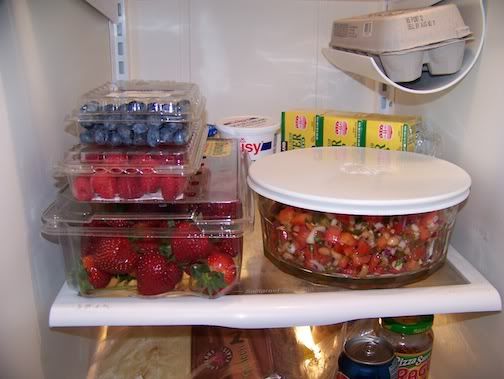
Store in a glass container so you can look at it every time the fridge is open.
Photobucket

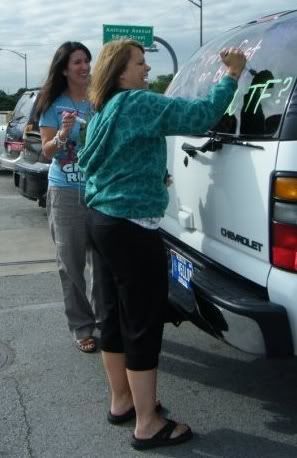
Here Stacie and I are vandalizing our friend's car while she was in the bathroom at a rest stop on the above-mentioned road trip.  That's me on the left with the amazing hair cape.
Photobucket


The "recipe" for Stacie's Hoosier Caviar

tomatoes (this time I used 8 roma tomatoes), seeded and diced
green peppers (but this time I used 2 red bell peppers), seeded and diced
red onion, chopped into tiny bits
green onions, white and green parts, diced
black eyed peas, 1 or 2 cans rinsed and drained
jalapeƱos, 2 or 3 minced
garlic, minced
cilantro, large handful, minced
Kraft Zesty Italian dressing

Chop up everything into small bits.  Toss it together in a large bowl with dressing.  Start off with a small amount and adjust to your liking.

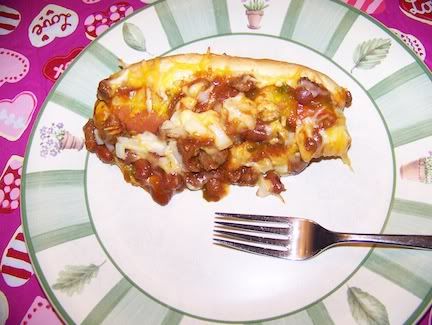
Baked Chili Cheese Dogs

Well now this is a great idea.  And a tasty one too!  Take an awesome food like a chili cheese dog and bake it and make it gooey.  Get your fork ready.
I got this idea from someone in a LiveJournal community that I follow.  I searched for her original recipe but couldn't find it after going through page after page after page.  But this is one of those things that is more of a method than a specific recipe so I'm sure I've done her proud.  :o)

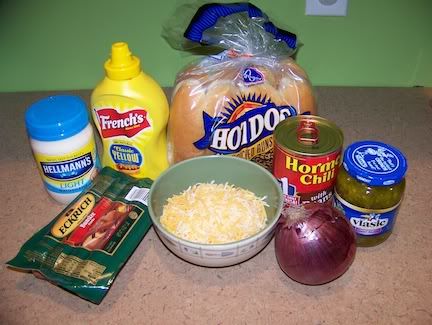
Get out all your chili dog goodies.  You could use homemade chili for it, but homemade chili never gets that thick, pasty texture that canned does.  Chili in a can is quite delightful.
Photobucket

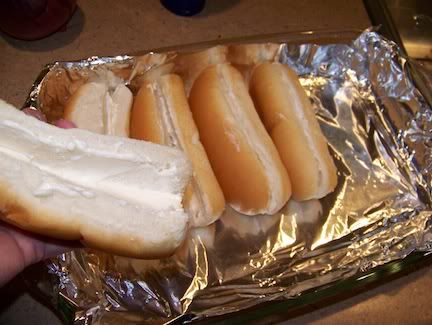
Preheat oven to 350.  Line a 9x13 casserole dish with foil.  Spread mayo on both sides of each hot dog bun.  Even if you hate mayo like I do, trust me on this one.  If you love mayo, then spread it on thick.  Line them up in the dish.  You can fit 8 in.
Photobucket

Add a hot dog, relish (for the love of all things holy, use dill relish and not sweet relish), then mustard.
Photobucket


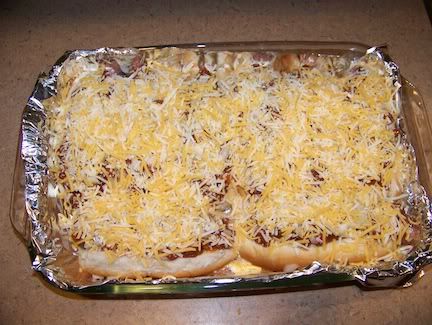
Then, add your chili, chopped onions and shredded cheese.
Photobucket

Really, REALLY cover them with cheese.  I probably could have used another whole bag. :o)
Photobucket

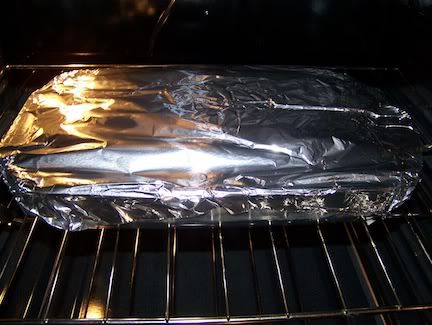
Cover with foil and bake at 350 for about 30 minutes.
Photobucket

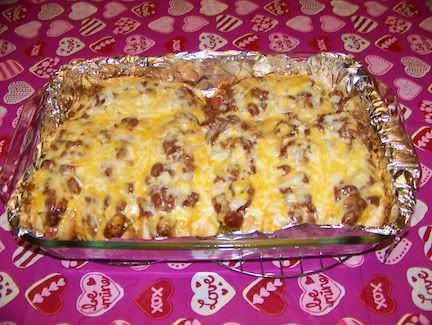
This is what you get.
Photobucket
Photobucket


Grab some napkins.
Photobucket

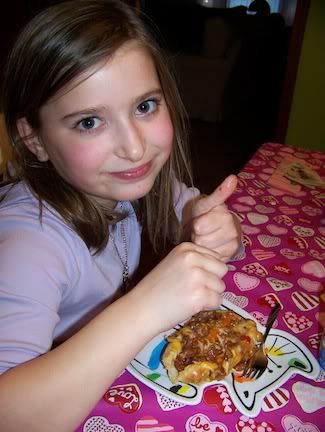
Sweet angel Tallulah liked them.  Thumbs up.
Photobucket

Tanner didn't like them?  Please stop me from the heart attack I'm having from the shock that he didn't like something.
Photobucket


Hot dogs
buns
mayo
mustard
diced onion
pickle relish
chili
cheese

Heat oven to 350.  Spread buns with mayo.  Assemble your hotdogs in a 9x13 casserole.
Add relish, mustard, onions, chili.
Cover the whole operation with shredded cheese.
Cover dish with foil then bake for 30 min.
Enjoy!

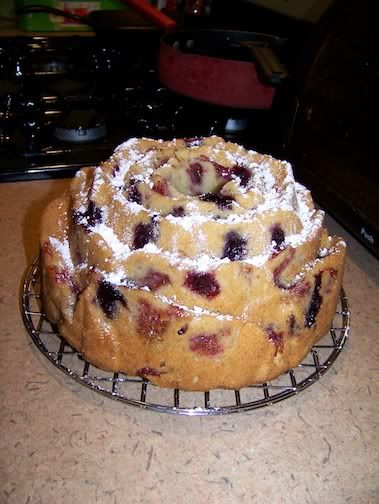
Mixed Berry Bundt Cake

Photobucket
Summer's here and all the awesome fresh local fruit inspired me to bake something yummy with it.  It was a difficult task to use them in a cake because we loooooove fresh fruit and we were all picking at the berries and eating them as I was washing them and setting them on a towel to dry.
Raspberries are my favorite but for some reason they are hard to find.  The raspberry farm I go to around here (Granny's Berry Patch on 421 outside of Valpo) lost her entire red raspberry crop this year.  Bummer!  I bought a package of them at Costco and was pleasantly surprised at how fresh and sweet they were!  Not a mushy one in the entire package.  Blueberries are always a nostalgic favorite because I grew up in Demotte, Indiana where the blueberry is king.  Well, maybe they're queen- we also have tons of corn farms there as well.  Corn is probably king.  And of course it's the best sweetcorn in the state (I'm looking at you , Sue Postma!!!!)  Anyway, people say that my current hometown, Plymouth, is the blueberry capitol but I ain't hearin' that.  I drive myself all the way back to Demotte to pick those big, juicy, God-fearing Dutch berries.  There's a difference people.  There's a difference.

I haven't blogged in a while and I'm a bit out of practice so I don't have the big group photo of all my ingredients.  So just pretend.

First, preheat your oven to 325.  Oops, I actually set my oven to 350 out of habit and had to put a piece of foil on top of the cake after about 40 minutes to keep it from getting too brown on top.

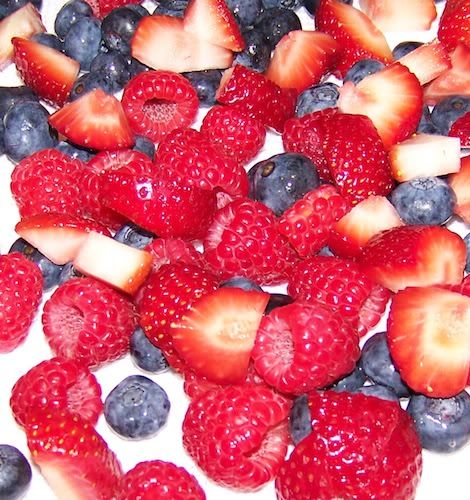
Wash the berries and set them out on a towel to dry.  The raspberries were really big so I ended up slicing them in half lengthwise.  I also quartered the strawberries.  I used heaping cups of each berry because when it comes to these guys, more is more!
Photobucket

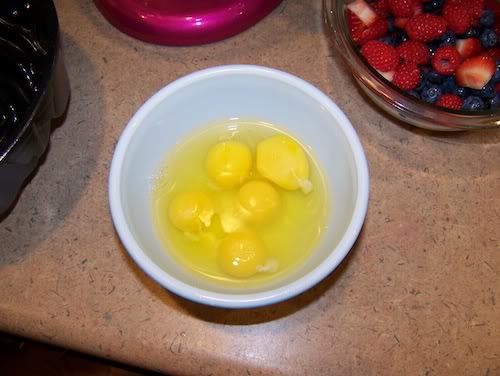
A tip- I always crack my eggs into a little bowl before adding to my batter.  Sometimes little bits of shell get in and it's difficult to get them out.  This way you dont' have to worry about a bit of shell getting into your food.  This bundt takes five eggs.  Oy!
Photobucket

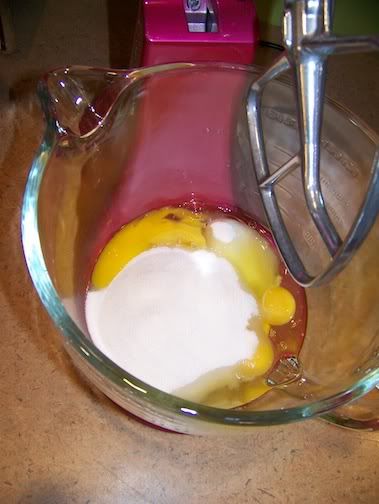
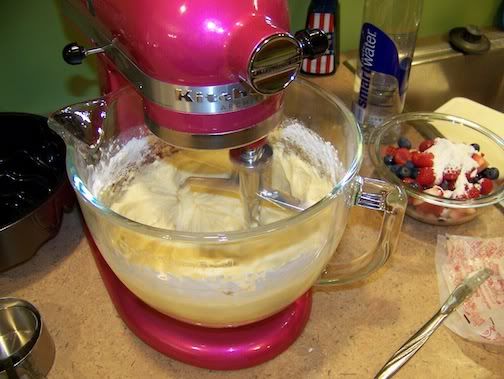
Combine your eggs and sugar.
Photobucket


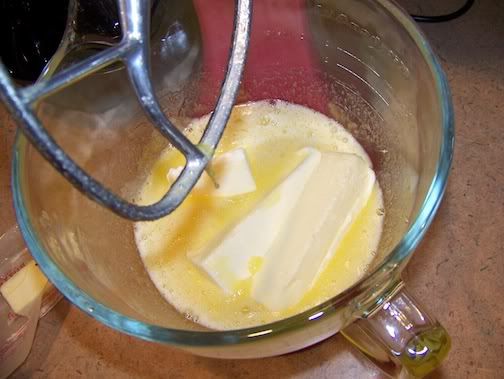
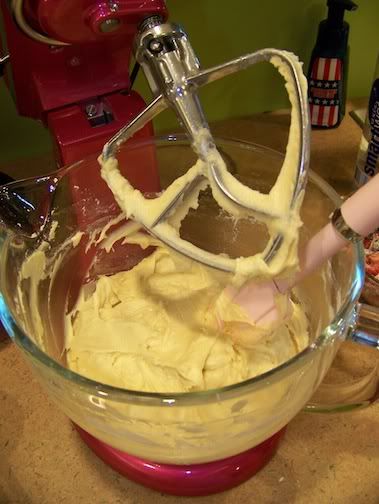
Add your butter and liqueur.  Beat until fluffy.  Bleh with the egg goo hanging off the beater.
Photobucket


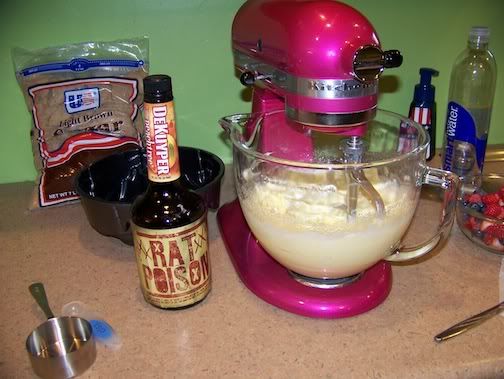
Ok, I didn't have "kirsch fruit liqueur" so I used some peach schnapps.  Is that ghetto?  I don't even know.  But I do know that when I tasted the batter it was REALLY good!  So go ahead you ghetto queens- use your peach schnapps in this cake.  (mine still has the 'Rat Poison' label I stuck on it from a Halloween party, hee-hee)
Photobucket
(By the way, there is no brown sugar in this recipe. It's just sitting on the counter because it's a seven pound bag that i bought from Costco.  Who has room in their cabinets for a seven pound bag of brown sugar?!?  Gotta find a place to stash that...)


Add the dry ingredients.  Beat this thing until well incorporated and there are no humps, no humps.  No lovely cakey lumps.
Photobucket


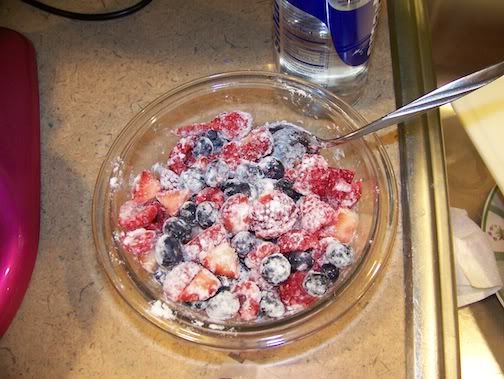
Toss the berries with the reserved flour.  It keeps them from sinking to the bottom of the cake.  Don't ask me why.  I don't know.  It's just science.
Photobucket


Be a good little girl and scrape yer bowl.  Get a spoon and eat some ghetto batter.
Photobucket

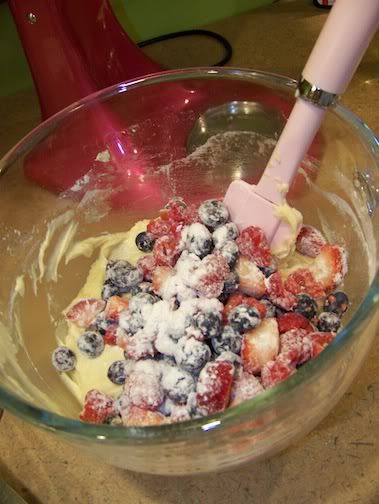
Ever so gently fold in those berries.
Photobucket


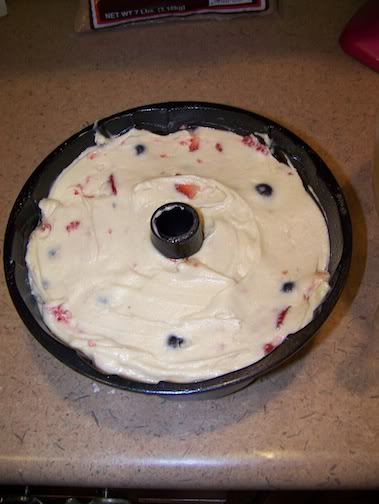
Pour into your pan.  This pan is flower-shaped and better than yours.
Photobucket


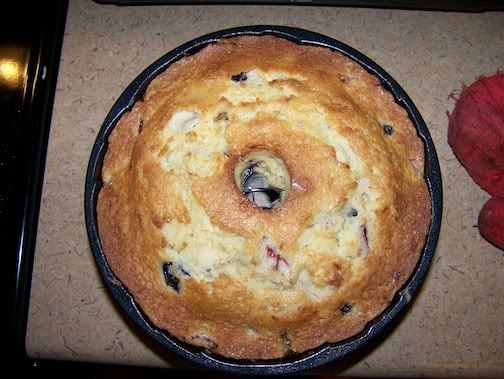
Bake it 60+ minutes until it looks like this.
Photobucket


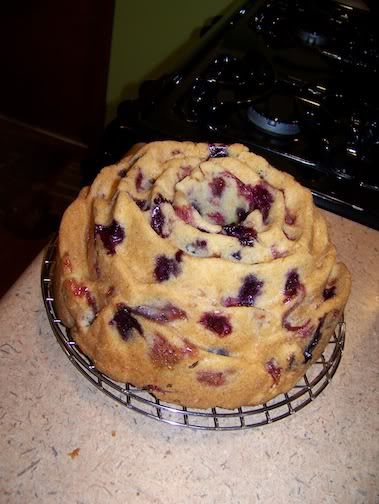
Let it cool for about 20 minutes in the pan so it doesn't fall apart.  Then invert it on a cooling rack.  Pretty, eh?
Photobucket


Hit it with some powdered sugar.
Photobucket
Photobucket

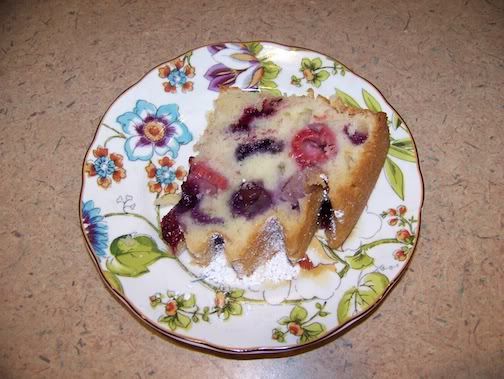
Eat it up, yum.  Tanner (my youngest) said it tasted really good but the raspberries "look like Butter's butthole."  Really, I should have stopped at one child.  But nooooooo, Reid insisted on two.  *sigh*
p.s. My dog's butt does NOT look like a cooked, halved raspberry.
Photobucket


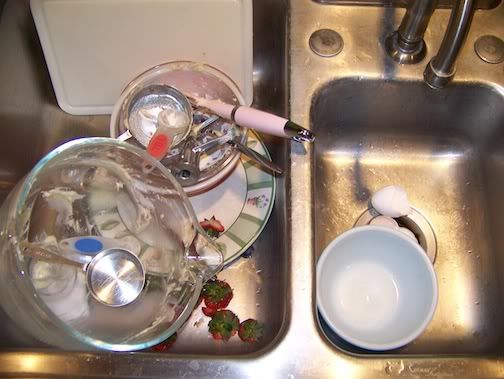
Cleanup on this one was not too bad.  Only a few bowls and stuff used.
Photobucket


Mixed Berry Bundt Cake
5 eggs
1 2/3 cups sugar
1 1/4 cups butter, room temp, cut into small pieces
2 TBSP kirsch or other fruit liqueur
2 1/2 cups all purpose flour
1 tsp baking powder
pinch of salt
1 cup raspberries
1 cup blueberries
1 cup strawberries
powdered sugar for dusting
Preheat oven to 325.  Butter and flour a 9-inch bundt pan.  Blend eggs and sugar in mixer.  Add butter and liqueur and beat until fluffy.  Add the baking powder, salt and all but 2 tablespoons of the flour and beat until well incorporated and no lumps remain.
In another bowl, toss berries with the 2 tablespoons of flour until evenly coated.  Gently fold the berries into the batter.
Pour batter into the prepared pan.  Bake until a toothpick inserted in the center comes clean (about an hour).  Remove from oven and let cool in the pan for 20-25 min.  Unmold the cake onto a rack to cool completely.
Dust the top of the cake with powdered sugar.  Serve at room temp.